Wireguard in Proxmox LXC containers
WireGuard has revolutionized the VPN landscape with its simplicity, high performance, and robust security features. As a lightweight and modern VPN solution, WireGuard is ideal for various applications, from securing personal communications to protecting corporate networks. Proxmox, a powerful open-source platform for enterprise virtualization, provides an excellent environment for running isolated and efficient Linux containers (LXC).
Combining WireGuard with Proxmox LXC containers offers a flexible and secure way to manage your VPN needs. Whether you're a developer, a systems administrator, or a tech enthusiast, this setup can help you achieve a secure and performant VPN solution within your virtualized infrastructure.
By the end of this tutorial, you'll have a fully functional WireGuard VPN running within an LXC container on Proxmox, ready to handle your secure networking needs.
User Mode vs. Kernel Mode
Understanding the different modes in which WireGuard can operate—user mode and kernel mode—can help you optimize its deployment for your specific needs.
WireGuard in Kernel Mode takes advantage of the high performance and low latency that comes with running directly within the operating system's kernel. This mode is ideal for environments where speed and efficiency are paramount. Kernel mode integrates seamlessly with the OS, providing near-native performance and making it the preferred choice for many users who need the best possible throughput and response times.
While running WireGuard in kernel mode offers high performance and low latency due to its deep integration with the operating system, it also comes with some significant drawbacks, especially in a virtualized environment like Proxmox:
- Security Concerns:
- Host Exposure: Running WireGuard in kernel mode requires installing the WireGuard module on the Proxmox host. This can expose the host to security vulnerabilities and increase the attack surface.
- Privilege Escalation: If an attacker gains access to the container, they might exploit kernel vulnerabilities to gain elevated privileges on the host system.
- System Maintenance:
- System Maintenance: Any issues or updates to WireGuard in kernel mode necessitate changes at the host level, which can complicate maintenance and potentially disrupt other services running on the host.
- Flexibility:
- Restricted Environments: In some environments, modifying the host kernel or installing additional modules is not permissible due to security policies or administrative
Given these drawbacks, this guide will focus on setting up WireGuard in user mode using wireguard-go. At the cost of losing some performance and latency, running WireGuard in user mode offers several advantages that align well with the goals of security, flexibility, and ease of maintenance:
- Enhanced Security: User mode runs entirely within the container, reducing the risk of compromising the host system. This isolation helps maintain a secure boundary between the container and the host.
- Simplified Management: Since user mode does not require kernel-level modifications, updates and changes can be made directly within the container, simplifying system administration and reducing downtime.
- Greater Compatibility: User mode is less dependent on specific kernel versions and can be more easily deployed across different environments, making it a versatile solution.
In future posts, I will delve into setting up WireGuard in kernel mode and explore its benefits and challenges in more detail. Additionally, we plan to create performance benchmarks to compare user mode and kernel mode setups, helping you make an informed decision based on your specific requirements. Meanwhile, these articles might help in your decision-making:
Step 1: Create and Start the LXC Container
Wireguard LXC container
Step 2: Install wireguard-go
Install wireguard-go:
apt update
apt upgrade
apt install golang-go wireguard-go wireguard-tools
Generate your server's private and public keys:
wg genkey | tee privatekey | wg pubkey > publickey
Download and install wireguard on your client to generate your client's private and public keys that will be used to connect to your server.
Create a config file at /etc/wireguard/wg0.conf on your server with the following content:
[Interface]
Address = 192.168.2.1
PrivateKey = <server's privatekey>
ListenPort = 51820

# To actually access the server’s LAN
PostUp   = iptables -A FORWARD -i %i -j ACCEPT; iptables -A FORWARD -o %i -j ACCEPT; iptables -t nat -A POSTROUTING -o eth0 -j MASQUERADE
PostDown = iptables -D FORWARD -i %i -j ACCEPT; iptables -D FORWARD -o %i -j ACCEPT; iptables -t nat -D POSTROUTING -o eth0 -j MASQUERADE

[Peer]
PublicKey = <client's publickey>
AllowedIPs = 192.168.2.2/24
Run wg-quick up wg0 on the server to start all network interfaces.
Your client configuration file should look like this:
[Interface]
Address = 192.168.2.2
PrivateKey = <client's privatekey>
ListenPort = 21841

[Peer]
PublicKey = <server's publickey>
Endpoint = <server's ip>:51820
AllowedIPs = 192.168.2.0/24

# This is for if you're behind a NAT and
# want the connection to be kept alive.
PersistentKeepalive = 25
Make sure that you pick a subnet that's not in usage by your network, in my case I picked
192.168.2.0/24.
Run wg-quick up wg0 on your client or activate the tunnel in your wireguard GUI client:
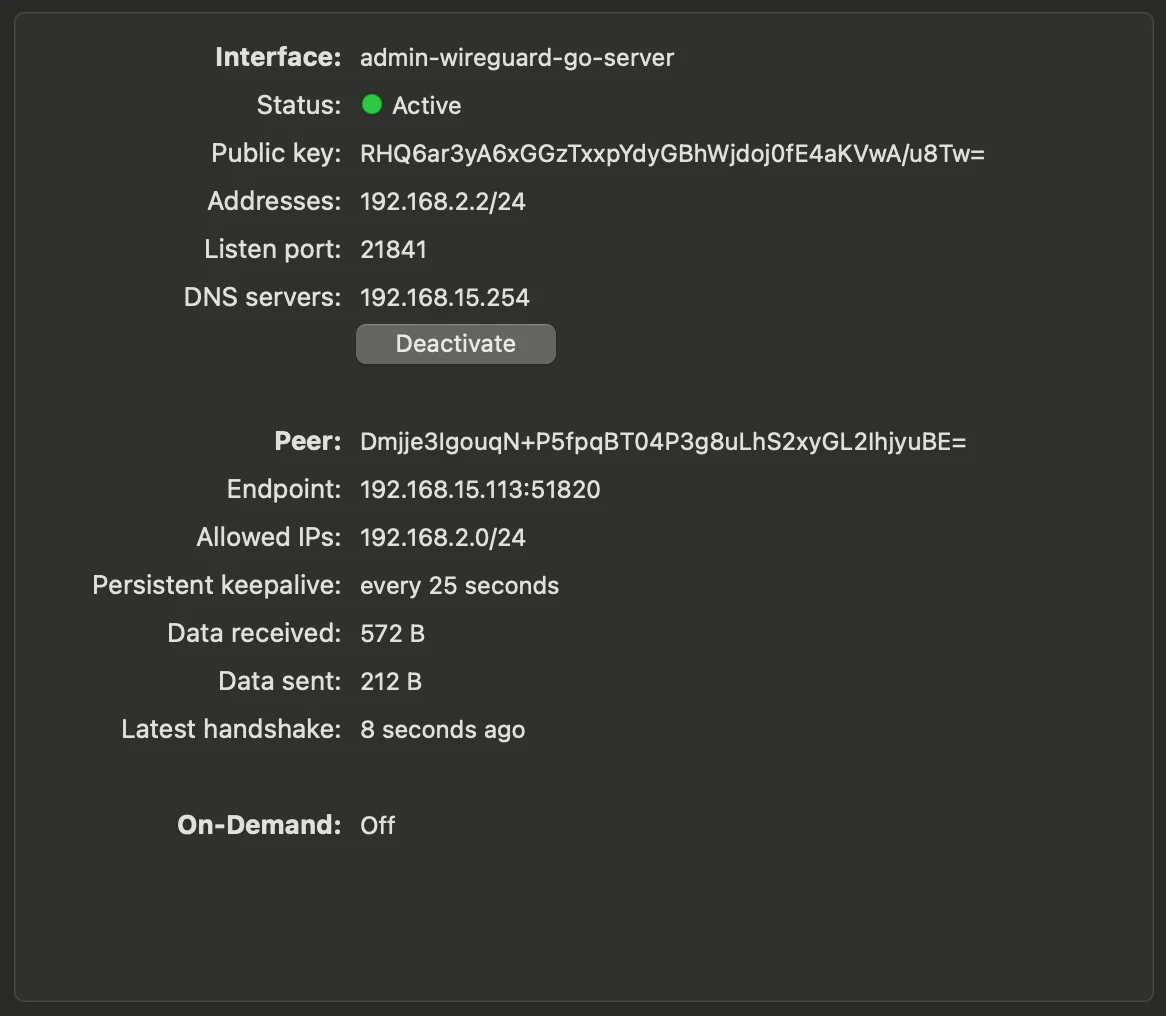
Now you should be able to ping from your client to your VPN server:
ping 192.168.2.1
To access your LAN through the VPN, make sure you have added the IP tables to your server config file, under the interface section:
PostUp   = iptables -A FORWARD -i %i -j ACCEPT; iptables -A FORWARD -o %i -j ACCEPT; iptables -t nat -A POSTROUTING -o eth0 -j MASQUERADE
PostDown = iptables -D FORWARD -i %i -j ACCEPT; iptables -D FORWARD -o %i -j ACCEPT; iptables -t nat -D POSTROUTING -o eth0 -j MASQUERADE
This assumes that your LAN interface is called eth0.
Now add your LAN subnet to the AllowedIPs in your client config, in my case my LAN subnet is 192.168.15.0/24.
AllowedIPs = 192.168.2.0/24, 192.168.15.0/24
Make sure you run wg-quick up wg0 again. You should be able to ping any IP in your LAN.
Step 3: Route all your internet traffic to VPN (optional)
If you want to forward NAT traffic ensure that IP forwarding is enabled on your WireGuard server. This is required for the server to forward packets between interfaces.
echo 1 > /proc/sys/net/ipv4/ip_forward
Enable IP Forwarding Permanently by adding the following line to /etc/sysctl.conf:
net.ipv4.ip_forward=1
Then, apply your changes:
sudo sysctl -p
Ensure that your firewall is not blocking traffic. Check the firewall rules to ensure that the WireGuard port (51820 in this example) is open. In proxmox it should be opened by default.
Now, change your client peer AllowedIPs to look like this:
AllowedIPs = 0.0.0.0/0
Restart your client connection.
Test your internet connectivity by enabling your VPN client and run:
ping 8.8.8.8
traceroute 8.8.8.8
Step 4: Ensure WireGuard runs automatically after boot
WireGuard provides a built-in systemd service template that you can use without creating a custom service file.
sudo systemctl enable wg-quick@wg0
sudo systemctl start wg-quick@wg0
sudo systemctl status wg-quick@wg0
Step 5: Custom DNS provider
If you run a DNS provider in your LAN, you can add it in your client VPN config, for example:
[Interface]
PrivateKey = <client's privatekey>
ListenPort = 21841
Address = 192.168.2.2/24
DNS = 192.168.15.254

...
Step 6: Expose your VPN to the internet
To access your WireGuard VPN from the internet, you need to forward the port used by WireGuard on your router to the IP address of your Proxmox LXC container. Typically, WireGuard uses UDP port 51820. Log into your router’s admin interface and navigate to the port forwarding section. Create a new port forwarding rule that forwards UDP traffic on port 51820 to the internal IP address of your WireGuard server (e.g., 192.168.1.100). Save the settings and restart the router if necessary. This configuration allows external devices to connect to your WireGuard VPN, providing secure access to your internal network from outside your LAN.
Additionally, to make connecting easier, you can set up Dynamic DNS (DDNS) to assign a domain name to your public IP address. This way, even if your public IP changes, the domain name remains consistent, allowing you to access your WireGuard server using a memorable domain name instead of an IP address. Many routers and third-party services offer DDNS support, which automatically updates the domain with your current public IP.
Setting up WireGuard Go in a Proxmox LXC container offers a flexible and efficient way to manage your VPN needs, especially when you want to avoid kernel dependencies. By using wireguard-go, you can leverage the simplicity and security of WireGuard in user space, ensuring compatibility across different environments. We've walked through the steps to install and configure WireGuard Go, set up IP forwarding and NAT, and ensure it starts automatically with systemd.
In future posts, we'll explore the kernel module setup in detail and possibly create performance benchmarks to compare the two implementations.
Thanks!! ✋🏻